
How to Add a Full Screen Background Image
Full screen background images are a great way to make your site stand out. Full Screen Background Images Pro is a WordPress plugin that lets you easily add an unlimited number of background images to your website.
How to Add a Full Screen Background Image in WordPress
First, install and activate Full Screen Background Images Pro. Once the plugin is active, you can easily add background images to any of your site’s:
- Pages
- Posts
- Categories
- Archives
- Blog page
- Home page
- Search page
- 404 error page
- Login page
- Or, globally on all pages
To do this, navigate to Appearance > Fullscreen BG Img menu, then click the Add New Image button.
At this point, you should be on a screen that looks like this:
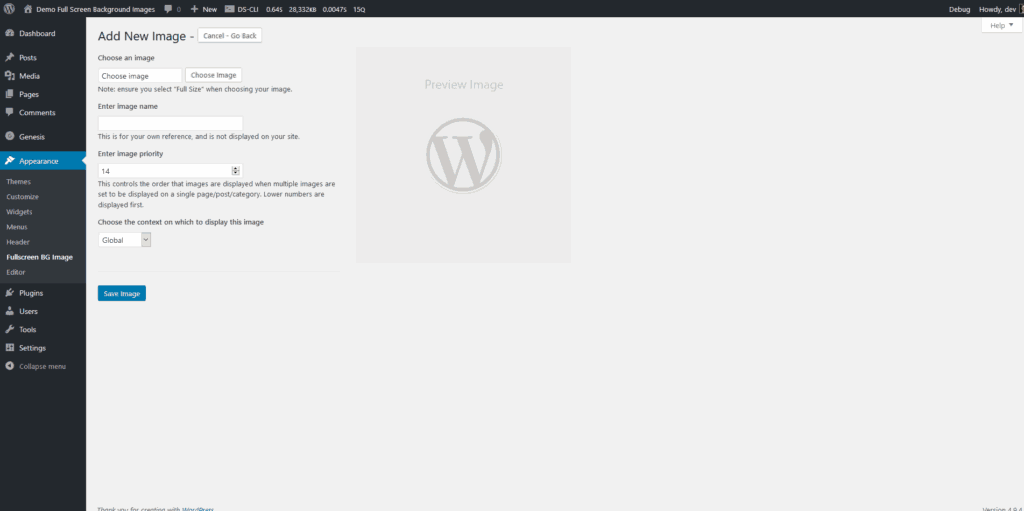
Next, click the Choose Image button. This will open up the Media Library window that you might be familiar with when adding photos to your blog posts or pages.
If the image you want to add is already on your site
- Select the image in the media library view. When selected, the image will have a checkmark in the top right corner of the image thumbnail.
- You can search for images by their name using the search media items box on the top right part of the grid area.
- Or you can filter the images by their upload date using the date menu on the top left part of the grid area. So if you know you uploaded an image in December 2017, it’s fairly easy to narrow down the list of images.
- Finally, click the Use as Image button
If the image you want to add is not already uploaded to your site
- Click the Upload Files tab at the top.
- Drag and drop your image from your computer into the window. Or, click the Select Files button to browse your computer to find the image.
- Once the upload is complete, make sure to select the image. When selected, the image will have a checkmark in the top right corner of the image thumbnail.
- Finally, click the Use as Image button.
Now, you will see the URL for the image in the box labeled “Choose an image”.
The file name of the image is now in the “Enter image name” box. You can change this to whatever you want. This label isn’t shown anywhere except for the back end of your site.
If more than one image is in a given context (page, post, category, etc.) the image priority will control the order images are shown. Images with lower priority numbers are shown first.
Finally, choose the context with which this image should be used. Available contexts are listed above.
When choosing the Posts, Pages, or Category context, an additional option is provided. This option lets you specify individual posts/pages/categories to restrict your images to. You can select the individual pages to add the image to, or if you want the image to be applied to all posts/pages/categories leave this field blank.
Add Background Images From Post Editor
When editing individual posts, pages, or custom post types, you have the option to add a background image to the post you are editing from the post editor. You should see a Full Screen Background Image box below the post editor like the one in the screenshot below. The options you are given are basically the same as what you would see when adding an image through the Appearance > Fullscreen BG Img menu. The only difference is that you don't have to choose the page that the image will be a background on, as the plugin will assume you want it to be a background on the current post you are editing.
Note that this option should be available on any page, post, or custom post type on your site.
